Modern road tires have made a dramatic shift from the narrow, high-pressure setups many riders grew up with. A larger-volume 28–32mm tire at a more moderate pressure can calm rough pavement, improve comfort, and help the bike maintain momentum over imperfect surfaces. That does not mean that the lowest possible pressure is the right one. A rider’s question in a recent cycling discussion captures the transition perfectly:
“The front wheel feels squirmy and too soft under 40psi.” a common comment when moving from 23mm to 30mm tires.
That sensation deserves attention. A little unfamiliarity is normal when moving from a harsh, high-pressure setup to a more compliant one. But a clearly vague, folding, or unstable feeling while climbing out of the saddle is useful feedback: the tire pressure, tire volume, rider load, terrain, or equipment compatibility needs a second look.
What changes when you stand up?
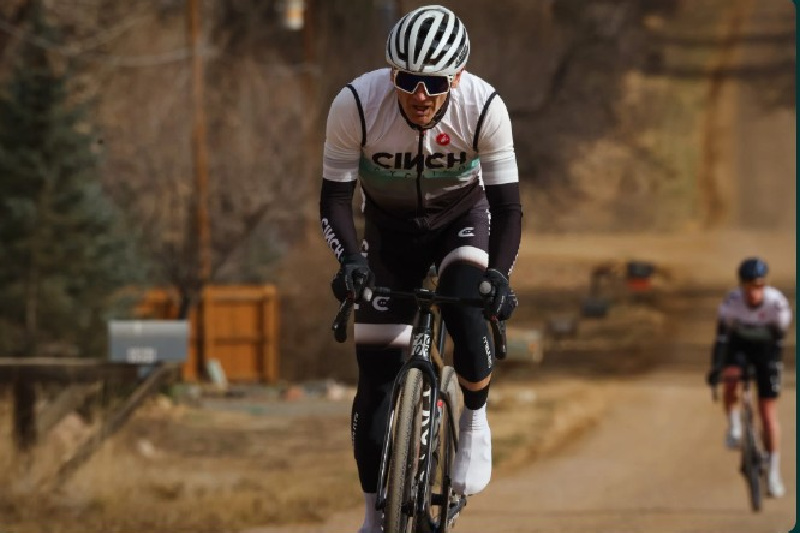
Out of the saddle, you move your body forward, pull on the bars, and apply more lateral force as the bike rocks beneath you. The front tire now has to support a changing load while maintaining its shape through steering inputs and side-to-side movement. A pressure that feels composed while seated can feel less supported when you stand and climb hard.
This does not mean that standing automatically demands an old-school, rock-hard tire. It means the setup must provide enough casing support for your particular combination of rider weight, bike weight, actual tire width, rim width, road surface, and riding style. Both Zipp and ENVE describe pressure recommendations as a starting point, not a universal prescription, and list system weight, tire volume, internal rim width, surface, and setup type among the variables that matter.
|
What you notice on the climb
|
Likely coaching interpretation
|
Productive next step
|
|
A new but controlled, supple feel
|
You may simply be adapting to a lower-pressure, higher-volume setup.
|
Ride several familiar climbs before changing anything; evaluate handling rather than judging by firmness alone.
|
|
A rhythmic sidewall “squirm” as you rock the bike
|
The front tire may lack enough support for your load and climbing style.
|
Confirm the calculator baseline, then test a small increase to the front pressure only.
|
|
Vague steering or a sense that the tire rolls under the rim
|
Treat this as a setup warning, not a performance trait to ignore.
|
Stop using that pressure for aggressive riding; check tire/rim compatibility and move pressure upward within approved limits.
|
|
Harsh chatter, poor traction, or a bike that bounces over broken pavement
|
Pressure may be too high for the surface, even if the tire feels very firm.
|
Reassess from a calculator baseline instead of returning automatically to maximum pressure.
|
Pressure is Personal
The replies in the original thread ranged from roughly 40 psi to the high 60s for tires described as “30mm,” with rider weights, measured tire widths, terrain, and equipment differing from one comment to the next. That is precisely why copying another rider’s number is rarely productive. A 30mm label does not tell you the tire’s measured width on your rim; it also does not reveal the rider’s total system weight, tube/tubeless setup, road quality, or how forcefully that rider climbs.
A better approach is to establish an informed baseline. Manufacturer calculators typically ask for tire size, inner rim width, system weight, riding surface, and setup type. Zipp explicitly recommends entering front and rear information to obtain separate starting pressures, while SILCA explains that tire size, pressure, system weight, and road surface all affect the pressure at which rough-surface losses become significant.
Coaching principle: Use a calculator to begin the conversation with your tires. Use repeatable riding to finish it.
A five-step process to dial in confidence
1. Start with the actual setup, not the sidewall label
Measure the inflated tire width if possible, and note your wheel’s internal rim width. Then calculate based on total system weight: rider, bike, bottles, tools, and ride gear. A wider tire and a wider internal rim generally change the pressure required to produce the same level of support. ENVE’s guidance, for example, bases road recommendations on rider weight with gear, bike weight, inner rim width, tire volume, intended surface, and tubeless setup.
2. Confirm the safety envelope first
Before experimenting downward, confirm that the tire is compatible with the wheel and that your test pressures are within the limits specified by both manufacturers. The number etched on a rim is a maximum safety limit, not a recommended target pressure; Zipp also notes that tire pressure choices are influenced by weight, gear, tire size, riding style, and terrain.
This check matters especially for hookless road wheels, but it is sensible for every tire-and-rim pairing. If a low-pressure test produces instability, repeated rim strikes, air loss, or a tendency toward pinch flats, return to a more supportive pressure and inspect the setup. ENVE likewise advises that riders may need additional pressure to avoid pinch flats when their wheel lacks the relevant anti-pinch-flat features.
3. Test the front tire deliberately
If the front end is where you feel the issue, do not change both tires at once. Begin from the calculator’s front/rear recommendation, use a consistent gauge, and test a familiar climb. Make a small front-pressure change—about 1–2 psi at a time—then repeat the same short out-of-saddle effort.
Pay attention to three things: steering precision, sidewall stability, and traction over broken pavement. The goal is not to erase all tire movement. The goal is to find a front end that tracks confidently when you pull on the bars without turning the ride into a rattling compromise.
4. Keep the test honest
Tire-pressure testing can be deceptively noisy. Use the same tires, route, and gauge; test in similar weather; and avoid changing body position, clothing load, or bottle weight if you are trying to compare performance. SILCA recommends isolating one variable at a time and conducting repeated runs at pressures above and below a calculator-derived starting point.
For a coach or self-coached rider, the simplest field protocol is often the best: use one familiar climb, perform three to five hard but controlled standing efforts, record the pressure and subjective handling notes, and repeat on another day if necessary. Do not make a decision from one sprint or one rough corner.
5. Match pressure to the day’s route
A tire pressure that feels perfect on smooth road pavement may be wrong for chipseal, wet leaves, broken asphalt, or gravel connectors. Lower pressure can improve comfort and reduce the rider-and-bike movement caused by rough surfaces, but there is still a lower boundary where casing support and protection suffer. Zipp describes lower pressures as potentially improving system efficiency and handling on rough conditions, while SILCA emphasizes that the pressure “break point” changes with surface, tire size, and total weight.
That is why the best setup is not a permanent number written on a garage wall. It is a well-supported range that you adjust intelligently for the tire, the route, and the ride.
Seated versus standing: should you change your climbing technique?
Not necessarily. Standing is a legitimate tool for changing muscle recruitment, raising torque for a short steep ramp, and creating momentum over a crest. If your lower-pressure setup feels stable after adjustment, there is no reason to avoid out-of-saddle climbing simply because you use wider tires.
However, the sensation can also be a useful prompt to become more deliberate. Rather than throwing the bike dramatically from side to side, keep your hands relaxed, allow the bike to move beneath you, and place your weight smoothly through the pedals and bars. A calmer upper body reduces unnecessary steering inputs, allowing you to distinguish a true pressure problem from an aggressive movement pattern.
The majority of rider’s experience is a familiar one: wider tires and lower pressures can make a road bike dramatically more comfortable, but the first standing climb may expose a setup that has gone a little too soft for its rider and terrain. Do not dismiss persistent front-end squirm as something you must simply “get used to,” and do not overcorrect by pumping every tire back to maximum.
Build a calculator-based baseline, stay within the tire-and-rim manufacturers’ limits, and test the front tire methodically in small steps. When the pressure is right, a modern road tire should feel supple over rough pavement, predictable through the bars, and planted when the climb asks you to stand and deliver power.